The Lowdown on Anthurium Plants with Velvet Leaves
If you’ve come across images or seen anthurium plants in person, you may have noticed that some varieties have leaves with an absolutely stunning velvety texture. The velvet leaves set these anthuriums apart visually and give them a unique allure. But what’s the deal with these velvet leaves – why do some anthuriums have them, and what do you need to know if you want to grow one yourself? Here’s a comprehensive guide to everything related to anthurium velvet leaves.
Identifying Velvet Leaf Anthurium Varieties
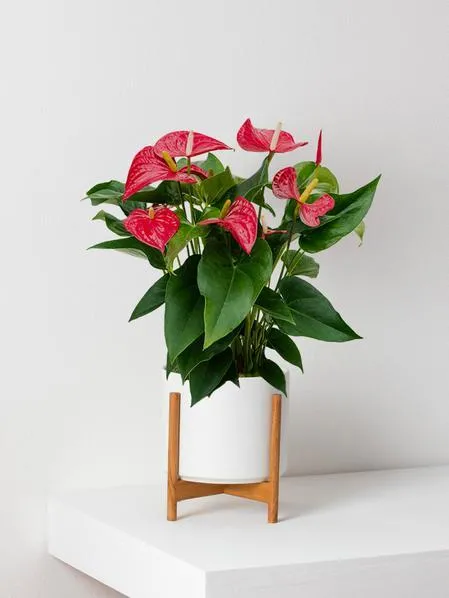
- Flamingo Flower (Anthurium andraeanum ‘Flamingo’) – As the name suggests, this variety has heart-shaped leaves that are a vivid pinkish-red color on top and covered in a soft velvet on the underside.
- Lady Luck (A. andraeanum ‘Lady Luck’) – Dark green velvet leaves with bright red veins running through them.
- Versicolor (A. versicolor) – Leaves emerge bright green and velvety, turning darker maroon or burgundy over time.
- Crystal White (A. crystallinum) – Leaves almost look fake they’re so perfectly oval, heart-shaped, and blanketed in pure white velvet.
There are several other named anthurium cultivars with velvety foliage too, but these are some of the more popular and impactful varieties. Their lush leaves really make a statement!
Why the Velvet Texture?
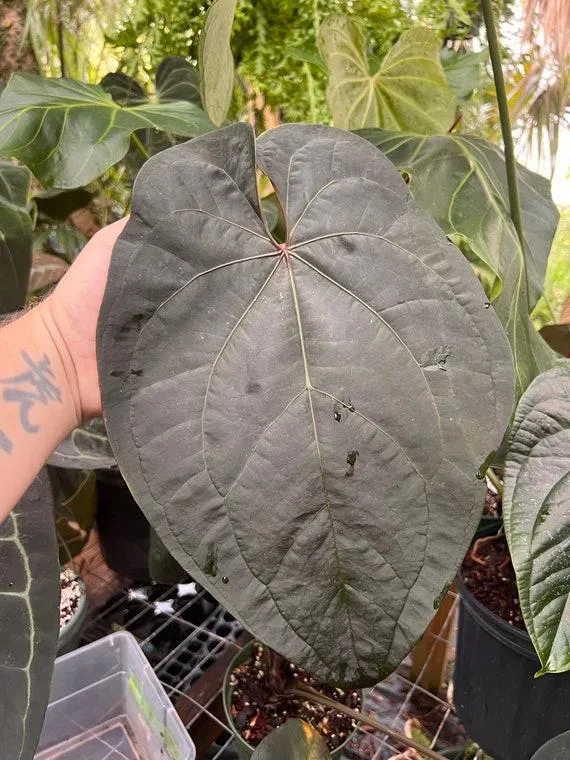
The velvet leaf appearance is caused by dense layers of tiny hairs called trichomes that cover the leaf surface. These hairs give the foliage its plush, satiny feel. Scientists believe the hairs act as a protective measure, helping ward off insect pests and deter feeding. They may also play a role in reflecting sunlight and regulating temperatures. Whatever the exact purpose, the result is a truly unique leaf texture that sets velvet anthuriums apart visually.
Care Requirements for Velvet Leaf Anthuriums
While all anthuriums prefer similar growing conditions, the velvet-leaved kinds have some specific care tips worth noting:
Humidity: Maintain high humidity levels around 50-60% as the leaves are more prone to drying out or developing brown edges without it. Consider a pebble tray or humidifier.
Light: Provide bright, indirect light to prevent scorching of the delicate leaves. Too much direct sun can damage the velvet coating.

Water: Only water when the top inch of soil is dry. The plush leaves are susceptible to rot if kept too moist. Allow the soil to dry out between waterings.
Fertilizer: Feed weekly during active growth with a dilute balanced fertilizer like 20-20-20. The velvet coating can cause nutrient deficiencies more easily.
Pruning: Since the leaves aren’t as hardy, be gentle when pruning or repotting. Snip off damaged areas with clean shears rather than tugging.
With the right care, velvet anthuriums will reward you with those show-stopping leaves for many months. Just take special precautions to protect their delicate foliage.
Dealing with Pests and Problems
The velvet coating, while gorgeous, does make these anthuriums slightly more susceptible to a few pests and problems:
Mealybugs: These cottony white insects love to feast on the velvet leaves. Inspect weekly and treat immediately with neem oil if spotted.

Spider mites: Tiny spider-like creatures that can create noticeable webbing. Control with neem oil or insecticidal soap applied every 5-7 days as needed.
Brown edges: A sign of dry air or overwatering. Adjust humidity and only water when top inch of soil is dry to remedy.
Leaf drop: The leaves may yellow and fall off if temperatures fluctuate too much or if the plant isn’t acclimated slowly to different conditions.
With regular care and pest monitoring, these issues usually aren’t too hard to manage on velvet anthuriums. Just be a bit more watchful of their delicate leaves.
Propagating Velvet Leaf Anthuriums
While you can purchase starter plants, it’s also possible to propagate velvet anthuriums from cuttings, expanding their numbers over time. Here are the basic steps:
- Take 4-6 inch stem cuttings just under a node in early spring or summer.
- Remove lower leaves but leave top set intact.
- Dip cut ends in rooting hormone powder.
- Plant in potting soil and keep warm, humid conditions until roots develop (2-4 months).
- Transplant new plants when well-rooted and acclimated for several weeks before increasing light/water normally.
With patience and the right environment, you can enjoy multiplying your beautiful velvet anthurium collection through propagation. Such satisfying new leaves to come!

Final Thoughts on Anthuriums with Velvet Foliage
From my experience growing various anthurium cultivars, the velvet-leaved kinds never fail to turn heads. Their plush, tactile leaves add such intrigue and visual appeal. While they do require slightly more finicky care, the payoff is truly worth it. Plus, nothing beats running your hands over those incredibly soft surfaces! If you appreciate unique tropicals with show-stopping foliage, an anthurium with velvety leaves is a no-brainer addition. Keeping them happy and multiplying their numbers through propagation is incredibly satisfying. I hope this guide has helped explain everything you need to know to succeed with these stunners. Let me know if any other questions come up!
Anthurium Leaf Varieties
| Variety | Leaf Color | Leaf Texture | Care Needs |
|---|---|---|---|
| Velvet | Deep green | Velvet-like softness | Moderate light and humidity |
| Laceleaf | Variegated green and white | Thin and delicate texture | Bright indirect light |
| Heartleaf | Dark green | Leathery texture | Moist soil and humidity |
| Quartett | Variegated red, pink, and white | Smooth texture | Bright light and high humidity |
| Flame | Red margins with green centers | Smooth texture | Bright light and moderate water |
FAQ
-
Why do anthurium velvet leaves turn brown and ugly?
Basically, brown spots and areas on an anthurium’s leaves are usually signs that the plant isn’t too healthy. The number one cause is usually not enough water. These plants like to stay moist, so letting the soil dry out can cause damage. Other issues could be not enough humidity, overwatering that leads to root rot, or pests like spider mites – basically, anything that stresses out the plant.
-
Is it normal for new anthurium leaves to be wrinkly?
Sometimes when a new leaf first forms on an anthurium plant, it can appear a little crinkly or wrinkly. Much like how a fresh prune looks slightly shriveled compared to a plump finished prune. Usually, within a few days the leaf will smooth out and expand to its full size as it completes growing. My friend Jeff who’s an expert plant guy says this is perfectly standard, so don’t stress – the leaf is just finishing cooking, so to speak!
-
How can I treat an anthurium with brown edges on its leaves?
If you notice the edges of an anthurium’s leaves turning brown, it likely means the plant is either getting too much direct sun or the growing conditions are too dry. To fix this, you’ll want to move the plant to a spot with bright indirect light rather than direct rays. Also check the soil and water thoroughly when the top inch feels dry. You can also try misting the leaves with a spray bottle to up the humidity around the plant. If the edges continue browning despite these adjustments, it could be a sign of nutrient deficiency – so you may need to feed it with a balanced houseplant fertilizer.
-
How often should an anthurium be watered?
There’s no single right answer for how frequently an anthurium needs water – it depends on factors like the size of the plant, the pot it’s in, and seasonal weather patterns. Nevertheless, as a general guide, most anthuriums like to stay slightly moist. Water when the top inch or two of soil becomes dry, then give it a good soak until water drains out the bottom. As a rule of thumb, every 7-10 days is usually sufficient in average indoor conditions. At the same time, it’s best not to have a rigid schedule and instead check the plant yourself to see when it’s thirsty.

-
What’s wrong if an anthurium’s leaves are limp?
If your anthurium’s leaves are droopy and floppy rather than standing tall and crisp, it could mean one of a few things. It’s possibly not getting enough water – limp leaves are basically like a plant screaming “I’m thirsty!” On the other hand, soggy soil from overwatering can have the same effect through root rot. Another potential cause is inadequate sunlight if the plant has become pale or stretched out. Finally, insect pests may be sucking the life out of it. Check thoroughly for signs of bugs. Normally stunning anthuriums demand our care and attention to stay perky!
-
How do I propagate an anthurium?
There are a few different ways to propagate anthuriums and grow new plants from an existing one. Basically, cuttings and offsets are the most common propagation methods. For cuttings, remove 4-6 inch sections from the stem, remove leaves from the bottom half, and place the stem in water. Roots should form within a few months. For offsets, wait for small plantlets to emerge from the main stem and remove them when they have a few roots and leaves of their own. Personally, I’ve had good results planting cuttings directly in potting soil. Just be patient – propagation takes some time but yields amazing rewards!
-
What kind of soil do anthuriums like?
Most plant experts agree that anthuriums grow best in a rich, well-draining potting mix. It needs to retain moisture yet allow excess water to pass through freely without sogginess. A good general purpose soil blended with add-ins like perlite, bark, or gravel works well. You can purchase pre-made “houseplant potting soil” or make your own with approximate ratios of 1 part each: potting soil, peat moss, and perlite. The roots like to stay slightly moist, so a mix that doesn’t compact is key. Overall, most any well-aerated potting blend should do the trick!
