A Complete Guide to Propagating Ivy Plants
If you’re looking to spruce up your indoor or outdoor spaces with gorgeous trailing vines, ivy plants are a wonderful option. Their ability to climb surfaces and spread out makes them ideal for covering walls, trellises, or other structures. However, before you go out and buy several ivy plants, you may want to consider propagating your own from cuttings. Not only is propagation cheaper, but it allows you to enjoy many more ivy plants throughout your home and garden.
Types of Ivy Suitable for Propagation
There are several common varieties of ivy that can be easily propagated through cuttings, including:
- English ivy (Hedera helix)
- Swedish ivy (Plectranthus verticillatus)
- Algerian ivy (Hedera canariensis)
- Needlepoint ivy (Hedera helix ‘Needlepoint’)
- Creeping fig (Ficus pumila)
English ivy is one of the most popular and hardy options. It thrives in a variety of light conditions and climates. Swedish ivy has attractive purple flowers and leaves that require slightly more sun. Whichever variety you choose, the propagation process is quite similar.
Collecting Cuttings
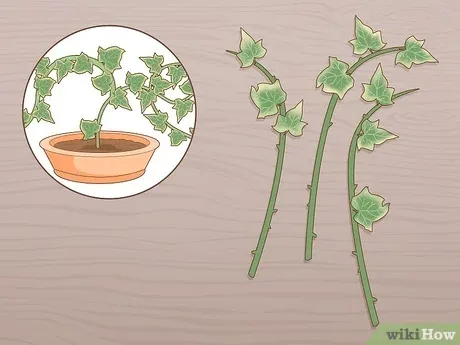
The best time to take cuttings is in late spring or early summer after the plant has become established. Select long, firm green stems that have roots or buds along their length. Use pruning shears to snip off 6-12 inches of stem. Remove any leaves from the bottom 1-2 inches to reduce moisture loss. From my experience, it works well to take cuttings in the morning after the dew has dried to reduce rot.
Preparing the Cuttings
Once you’ve collected your cuttings, it’s time to get them ready for rooting. Fill a container with propagation mix or a 1:1 ratio of perlite and potting soil. Perlite helps improve drainage. Make inserts in the soil about 1/2 inch deep and 1-2 inches apart. It’s important not to bury the cuttings too deep or the soil may cause rot. Place each cutting into the soil vertically so a node or bud is below the surface. Firm the soil gently around the stem.
Providing the Right Environment
Ivy cuttings need high humidity levels and moderate temperatures to develop roots successfully. Covering the container with a plastic bag securely maintains humidity. Place the container in bright, indirect light. Temperatures around 70-75°F work well. Check the soil moisture daily – ivy cuttings need consistently moist but not soggy soil to thrive. Mist the leaves occasionally if the plastic covering seems too dry.

After a few weeks, inspect the cuttings. You may see white roots emerging from the nodes buried in the soil. Once they have developed an extensive root system, usually 4-6 weeks, it’s time to transplant the rooted cuttings into pots. The plastic bag can now be removed permanently.
Caring for Young Ivy Plants
Newly potted ivy plants require care and attention as their root systems become established. Watering needs may be greater than for mature plants, so check the soil regularly and water before it completely dries out. Continue providing indirect light. Once they start actively growing upward, it’s fine to move plants to brighter areas over time. You can also start training them up trellises or structures at this stage using ties or clips.
When maintaining humidity isn’t practical, sprinkling the soil occasionally can offer temporary relief. Don’t overwater or let plants sit in water as they remain vulnerable to root rot. Gentle tugs on new growth will indicate when plants are firmly rooted enough to be treated like adult ivies. With diligent care, your propagated cuttings should grow into beautiful, full ivy plants to decorate your home!
Tips for Success
Propagating ivy through stem cuttings takes some patience but is kind of easy once you get the hang of it. Here are some tips that can help ensure your success:
- Use sterilized tools and containers to reduce disease risk
- Take cuttings early in the morning for maximum moisture
- Keep the soil consistently moist but not soaked
- Provide proper temperatures and high humidity
- Wait to transplant until you see extensive root growth
- Gradually acclimate new plants to less humidity
- Give rooted cuttings adequate care as they establish
With a little TLC, your ivy propagation project is sure to be an absolute breeze. Before you know it, you’ll have tons of beautiful vines to liven up your indoor and outdoor spaces. Heck, you may end up giving cuttings to friends and family too! Let me know if you have any other questions – I’d be happy to help further.
Frequently Asked Questions
Here are answers to some common questions people have about propagating ivy:

Can ivy be propagated in water?
While ivy can technically be rooted in water, soil or a soil-based mix tends to produce better results. The substrate provides more stability and nutrients essential for strong root growth. Water propagation requires careful monitoring to prevent rot.
How long before I see roots on my cuttings?
Most ivy varieties will start showing signs of new roots within 4-6 weeks under ideal growing conditions. However, it can sometimes take 8 weeks or more depending on the time of year and plant vigor. Be patient and don’t pull up cuttings too early to check!
Can clippings from outdoor ivy be used to propagate indoors?
Certainly! Just be sure to acclimate any outdoor cuttings by gradually exposing them to indoor light levels over 5-7 days to reduce shock. Outdoor cuttings may also benefit from a preventative fungicide dip to discourage potential diseases brought inside.
My cuttings are bent – will they still root?
As long as the stem still has buds and is green, slight bending shouldn’t prevent rooting. Gently straighten bent stems before sticking them in the soil. However, cuttings with serious cracks or damage are less likely to succeed.
I hope this detailed guide helped provide answers to all your questions about propagating ivy plants from cuttings! Let me know if any other issues come up. Happy planting!
Steps for Propagating Ivy:
| Step | Details |
|---|---|
| 1. | Choose a healthy parent plant. Select a vine with new growth that isn’t flowering. |
| 2. | Take 4-6 inch cuttings. Cut just below a node (the point where leaves connect to the vine). Remove lower leaves to leave 1-2 sets at the top. |
| 3. | Dip cut ends in rooting hormone. This will encourage new root growth. Lightly dust cut ends with powder. |
| 4. | Place in potting soil. Push cuttings 1-2 inches into a pot filled with well-draining soil. Space 6 inches apart. |
| 5. | Mist soil and cuttings daily. Keep soil lightly moist as roots develop over next 4-6 weeks. |
| 6. | Move pot to sunlight when roots form. You’ll see new growth appearing. Transplant or train onto a trellis when well-rooted. |
FAQ
-
How do I get ivy to grow?
Ivy needs sunlight to grow. Put the plant in a spot with partial shade. Water when the soil becomes dry. Fertilize in the spring and summer. Cut it back so it doesn’t get too big. Basically, give it what it needs and it’ll grow on its own.

-
What kind of soil does ivy like?
Ivy grows well in most soils. It does best in soils that drain well so the roots don’t sit in soggy mud. A soil consisting of mostly loam or a potting mix is good. You can add compost or other organic matter to improve drainage. On the other hand, really heavy clay soils may cause issues.
-
How do I make ivy climb?
To get ivy to climb, you need something for it to grab onto. Attach the stem to a trellis, fence, wall, or other upright surface using strips of cloth, string, or cable ties. The ivy will send out tiny tendrils that latch onto whatever they touch. before long it will be climbing all over the place. You can also train it up an arch or gateway.
-
Can ivy be grown from cuttings?
Yes, ivy is very easy to propagate from cuttings. Simply take a 6 inch stem cutting, remove the bottom leaves, and stick the stem in moist soil. Spray the top of the soil to keep it from drying out too fast. Within a few weeks, roots and new growth should appear. Now you’ll have more ivy plants without spending lots of money buying new ones. Growing from cuttings is a cheap and easy way to get more ivy.
-
Is ivy good for the environment?
While ivy does provide shelter for birds and insects, it can be invasive in some environments. It grows rapidly and smothers other plants if not managed. However, in ideal conditions like a partly shaded garden, ivy offers benefits. It prevents soil erosion, gives shelter to critters, and absorbs toxins from the air. On the other hand, it’s always wise to choose native plant species when possible to support local wildlife.
-
How long does it take ivy to spread?
The rate of ivy’s growth basically depends on conditions like temperature, soil quality, amount of sun, and how established the plant is already. But generally speaking, ivy can spread at an amazing pace of up to two feet per year. Before you know it, a tiny clipping can morph into a massive groundcover. If it’s something you want contained, regular pruning is necessary. Otherwise, it may suddenly take over your whole yard like a crazy, rampaging vine!
-
Can animals be harmed by ivy?
While ivy isn’t poisonous, pets running around in an overgrown ivy patch could potentially get tangled or entrapped. Cats especially seem to love batting around in ivy but there’s a risk of fur matting or thin vines wrapping tightly. There are even rare reports of small animals accidentally getting hanged. So it’s best to keep ivy trimmed back, especially around areas where dogs or cats play. Ivy pollen can also trigger allergic reactions in some dogs.